
If you want homemade chocolate pudding, this recipe couldn’t be any easier! It’s made from scratch with simple pantry staples, then finished with butter and vanilla for an extra silky texture.

This post may contain affiliate links. See my disclosure policy.
Why You’ll Love My Chocolate Pudding
- The ingredients are simple. You only need cocoa powder, sugar, cornstarch, salt, milk butter and vanilla. That’s it! No funky thickeners or additives here.
- There’s no eggs! My recipe is naturally egg-free, so there’s no need to temper eggs or make a custard base.
- It’s rich and chocolatey. Cocoa powder gives it a deep chocolate flavor without needing melted chocolate. Again, we’re going for easy!
- It’s perfectly creamy. Whole milk and a little butter gives it a smooth, luscious texture. Think creamy, store-bought chocolate pudding, without the added gums or emulsifiers.
This chocolate pudding is so nostalgic! I have several recipes for chocolate pudding on my website, including a chocolate chia pudding (naturally thickened with chia seeds), a chocolate avocado pudding (thickened with avocado), and chocolate pots de creme (with an ultra-rich and decadent custard base). I also have chocolate mousse if you love a fluffy and airy texture.
But for this classic chocolate pudding recipe, I wanted to keep things really easy and straightforward. So I whipped up this version that’s most similar to a boxed mix or pudding cup that you’d get from the supermarket, but made from scratch.
You don’t have to temper any eggs and you don’t have to chop and melt any chocolate. You just have to whisk a few ingredients together on the stove and watch as it transforms into a thick and creamy chocolate pudding in minutes! It’s almost like magic. 😉
Chocolate Pudding Ingredients

- Unsweetened cocoa powder: You can use raw cacao powder or unsweetened cocoa powder. Dutch-process is fine as well. They all work great!
- Granulated sugar: You can use any granulated sugar in this recipe, though I love to use coconut sugar. It adds just the right amount of sweetness with subtle caramel undertones.
- Cornstarch: This is the key thickener that transforms the milk into a creamy, spoonable pudding.
- Salt: A little salt helps to balance the sweetness and let the chocolate flavor pop.
- Whole milk: Whole milk gives you the creamiest texture without making the pudding overly heavy.
- Unsalted butter: Since this pudding doesn’t contain melted chocolate, a little butter adds richness and creates a smoother, silkier finish.
- Vanilla extract: A little splash helps to round out the sweet, chocolatey flavor.
How to Make Chocolate Pudding

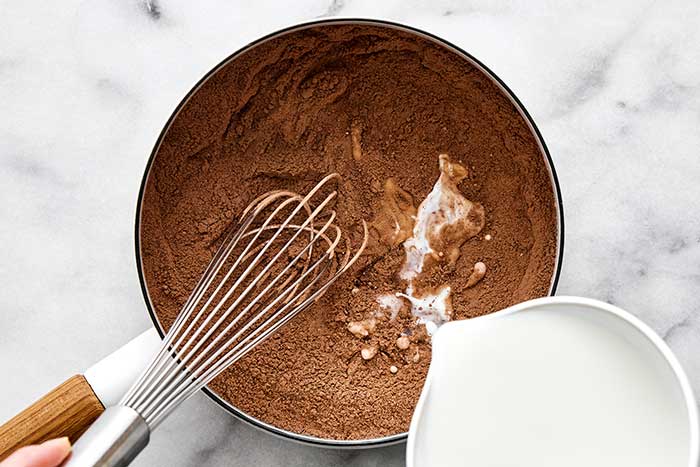
Step 1: Mix the ingredients together on the stove. In a medium saucepan, whisk together the cocoa powder, sugar, cornstarch, and salt. Then slowly pour the milk into the saucepan while whisking, until smooth and no lumps remain.

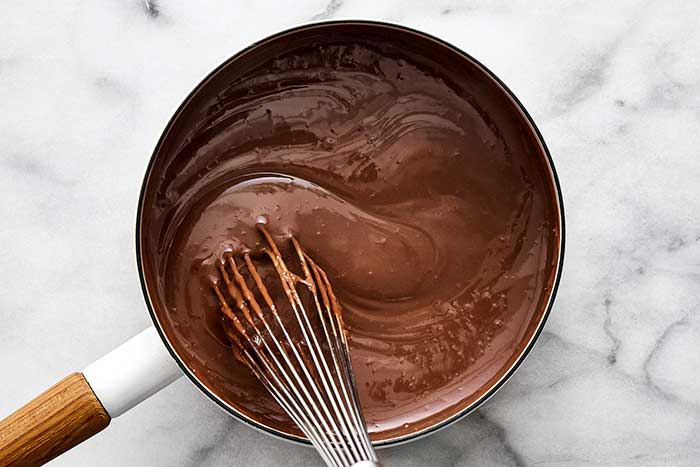
Step 2: Cook the pudding. Heat the mixture over medium heat and whisk it constantly as it begins to thicken (it can thicken surprisingly quickly on the bottom). Once the pudding starts bubbling, continue whisking it for about 1 minute, until it’s thick and creamy.

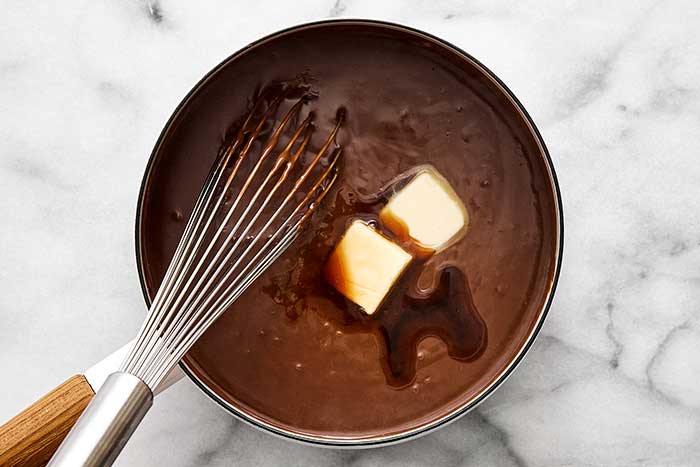
Step 3: Add the butter and vanilla. Remove the saucepan from the heat, and whisk in the butter and vanilla extract, until it’s silky smooth.

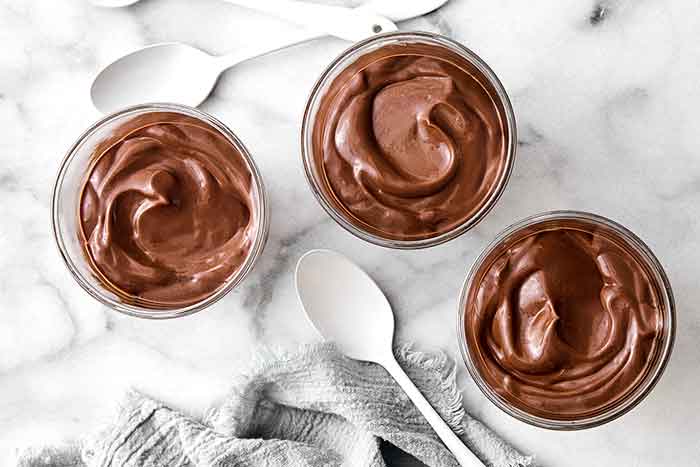
Step 4: Chill and serve. Divide the pudding between 6 small serving glasses or ramekins. Press plastic wrap directly against the surface of each pudding to prevent a skin from forming. Then place them in the fridge and chill for at least 2 hours, or until completely set. Serve plain or add your favorite toppings!
Lisa’s note: The serving size is fairly small, at a little over half a cup. If you’d like bigger portions you can divide the mixture between 4 serving glasses or ramekins.
Topping Ideas
This chocolate pudding is delicious on it’s own, but if you want to make it extra special you can add a dollop of whipped cream, chocolate shavings, fresh raspberries or strawberries, or even a sprinkle of flaky sea salt.
And for a little crunch, you can always add some chopped toasted hazelnuts (my personal favorite!), almonds, or pistachios.
How to Store
Once chilled, cover the pudding and store in the fridge for 3 to 4 days. I don’t recommend freezing this chocolate pudding because cornstarch-thickened puddings have a tendency to become water or grainy after they’re frozen and thawed. So it’s best to enjoy this the same week you make it!
Frequently Asked Questions
Yes, you can! You can use full-fat coconut milk instead of whole milk and a dairy-free butter alternative.
You can, but just be aware that arrowroot powder thickens differently and can lose some of it’s thickening powder if it’s cooked too long or at too high a temperature. I use arrowroot powder in my banana pudding recipe, but cornstarch gives you a more reliable, classic pudding texture.
Yes, with a caveat. And that’s that you don’t re-stir it. You just eat it straight out of the bowl that way.
Cornstarch-thickened puddings can become VERY loose, almost liquidy, when stirred after they’ve chilled and set. That’s because cornstarch creates the “thickening” structure to the pudding. And when you re-stir it, that structure breaks down. Ask me how I know? Hint: been there done that with pudding that turned into soup! 😂
That’s why store-bought puddings often have a little gelatin in their mixes, so they maintain that structure after stirring. I don’t include gelatin in this recipe, but you could always add a little if you prefer that thicker structure.
Long story short: it’s best to portion and serve this recipe in individual glasses.
Yes, if you don’t want a thick skin on the top of the pudding after it’s chilled. This really does get a skin on it.
If you try my chocolate pudding recipe, I’d love to hear your thoughts in the comment box below. Your review helps others in the community!

Description
Equipment
- Mini trifle glasses This is what I'm using in the photos!
Ingredients
- ½ cup unsweetened cocoa powder
- ½ cup coconut sugar, or other granulated sugar
- ¼ cup cornstarch
- ½ teaspoon kosher salt
- 3 cups whole milk
- 2 tablespoons unsalted butter
- 1 teaspoon vanilla extract
Instructions
- Mix together on the stove. In a medium saucepan, whisk together the cocoa powder, sugar, cornstarch, and salt. Slowly pour the milk into the saucepan while whisking, until smooth and no lumps remain.

- Cook the pudding. Heat the mixture over medium heat and whisk it constantly as it begins to thicken (it can thicken surprisingly quickly on the bottom). Once the pudding starts bubbling, continue whisking for about 1 minute, until thick and creamy.
- Add the butter and vanilla. Remove the saucepan from the heat, and whisk in the butter and vanilla extract, until silky smooth.
- Chill and serve. Divide the pudding between 6 small serving glasses or ramekins. Press plastic wrap directly against the surface of each pudding to prevent a skin from forming. Place in the fridge and chill for at least 2 hours, or until completely set. Serve plain or add your favorite toppings!
Lisa’s Tips
©Downshiftology. Content and photographs are copyright protected. Sharing of this recipe is both encouraged and appreciated. Copying and/or pasting full recipes to any social media is strictly prohibited.


