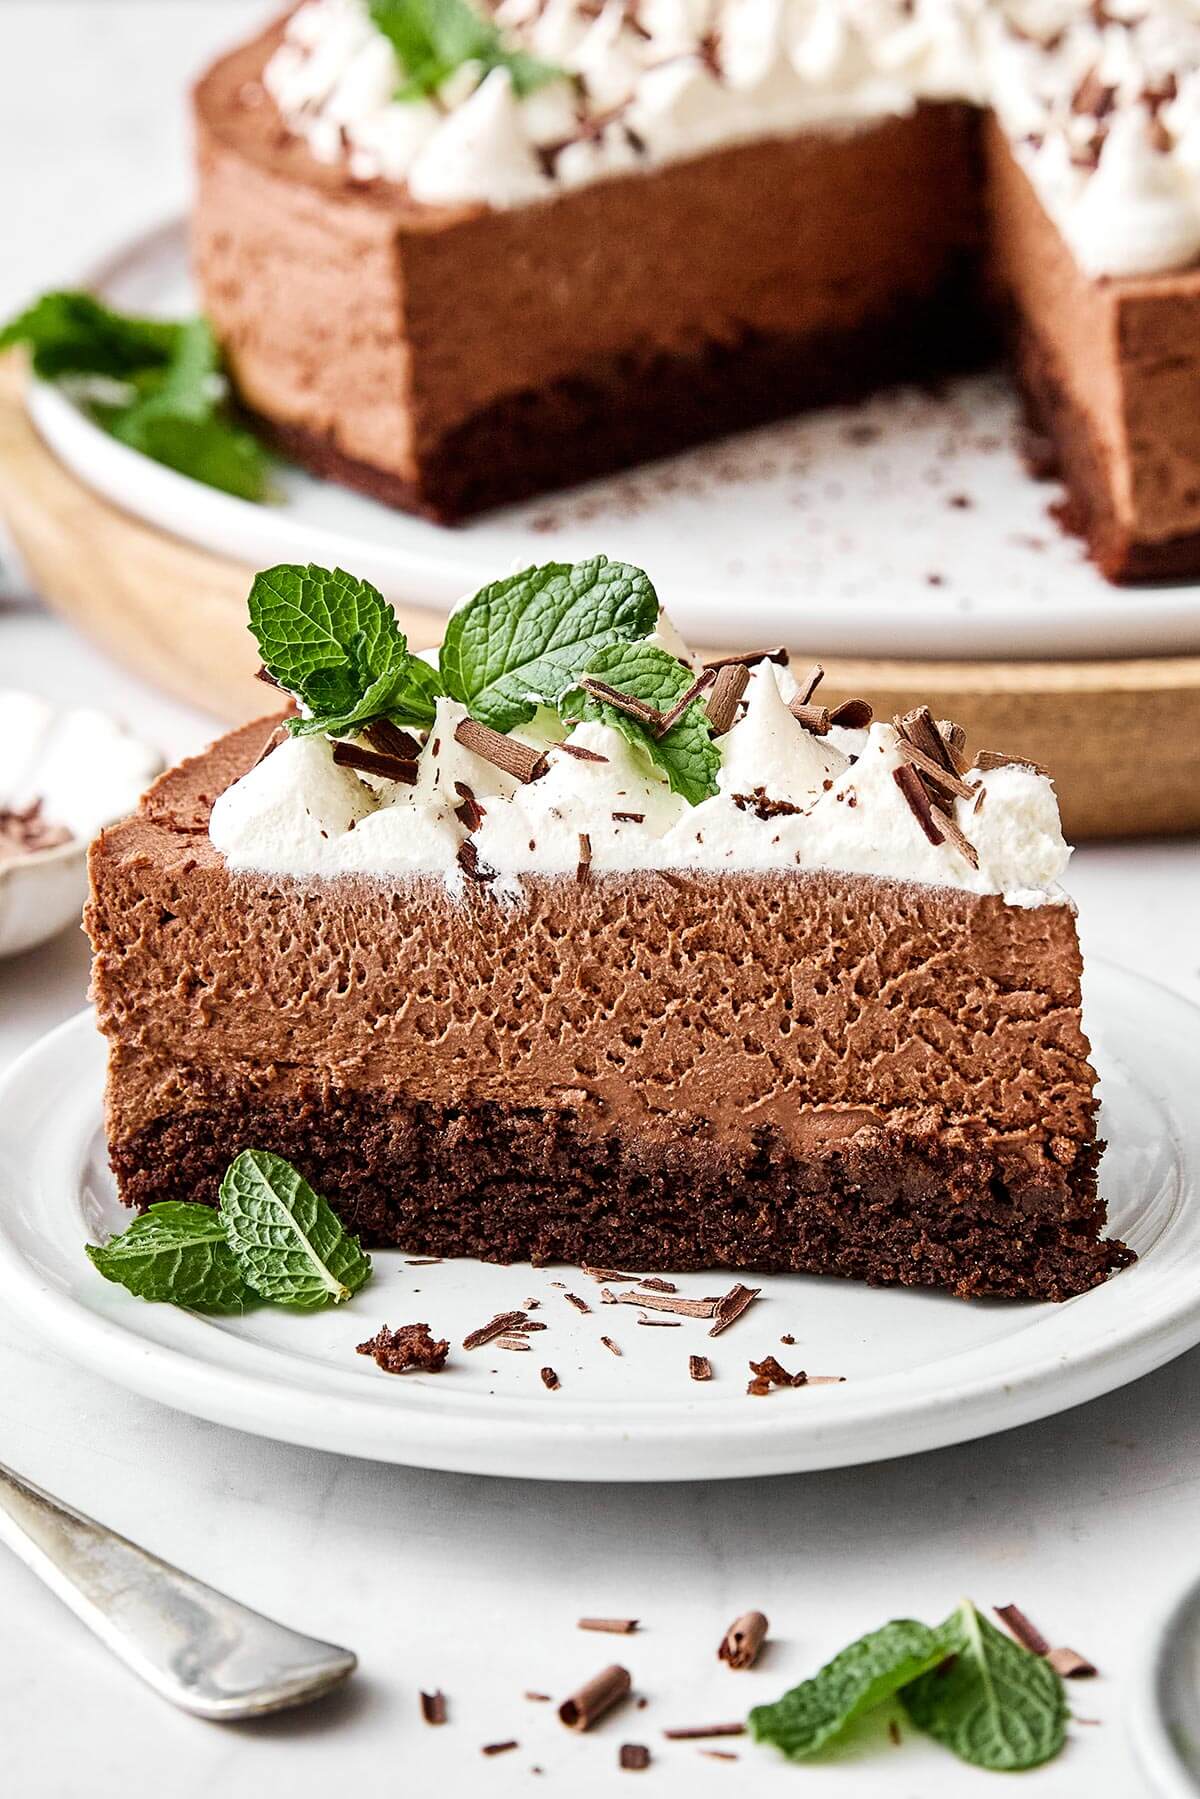
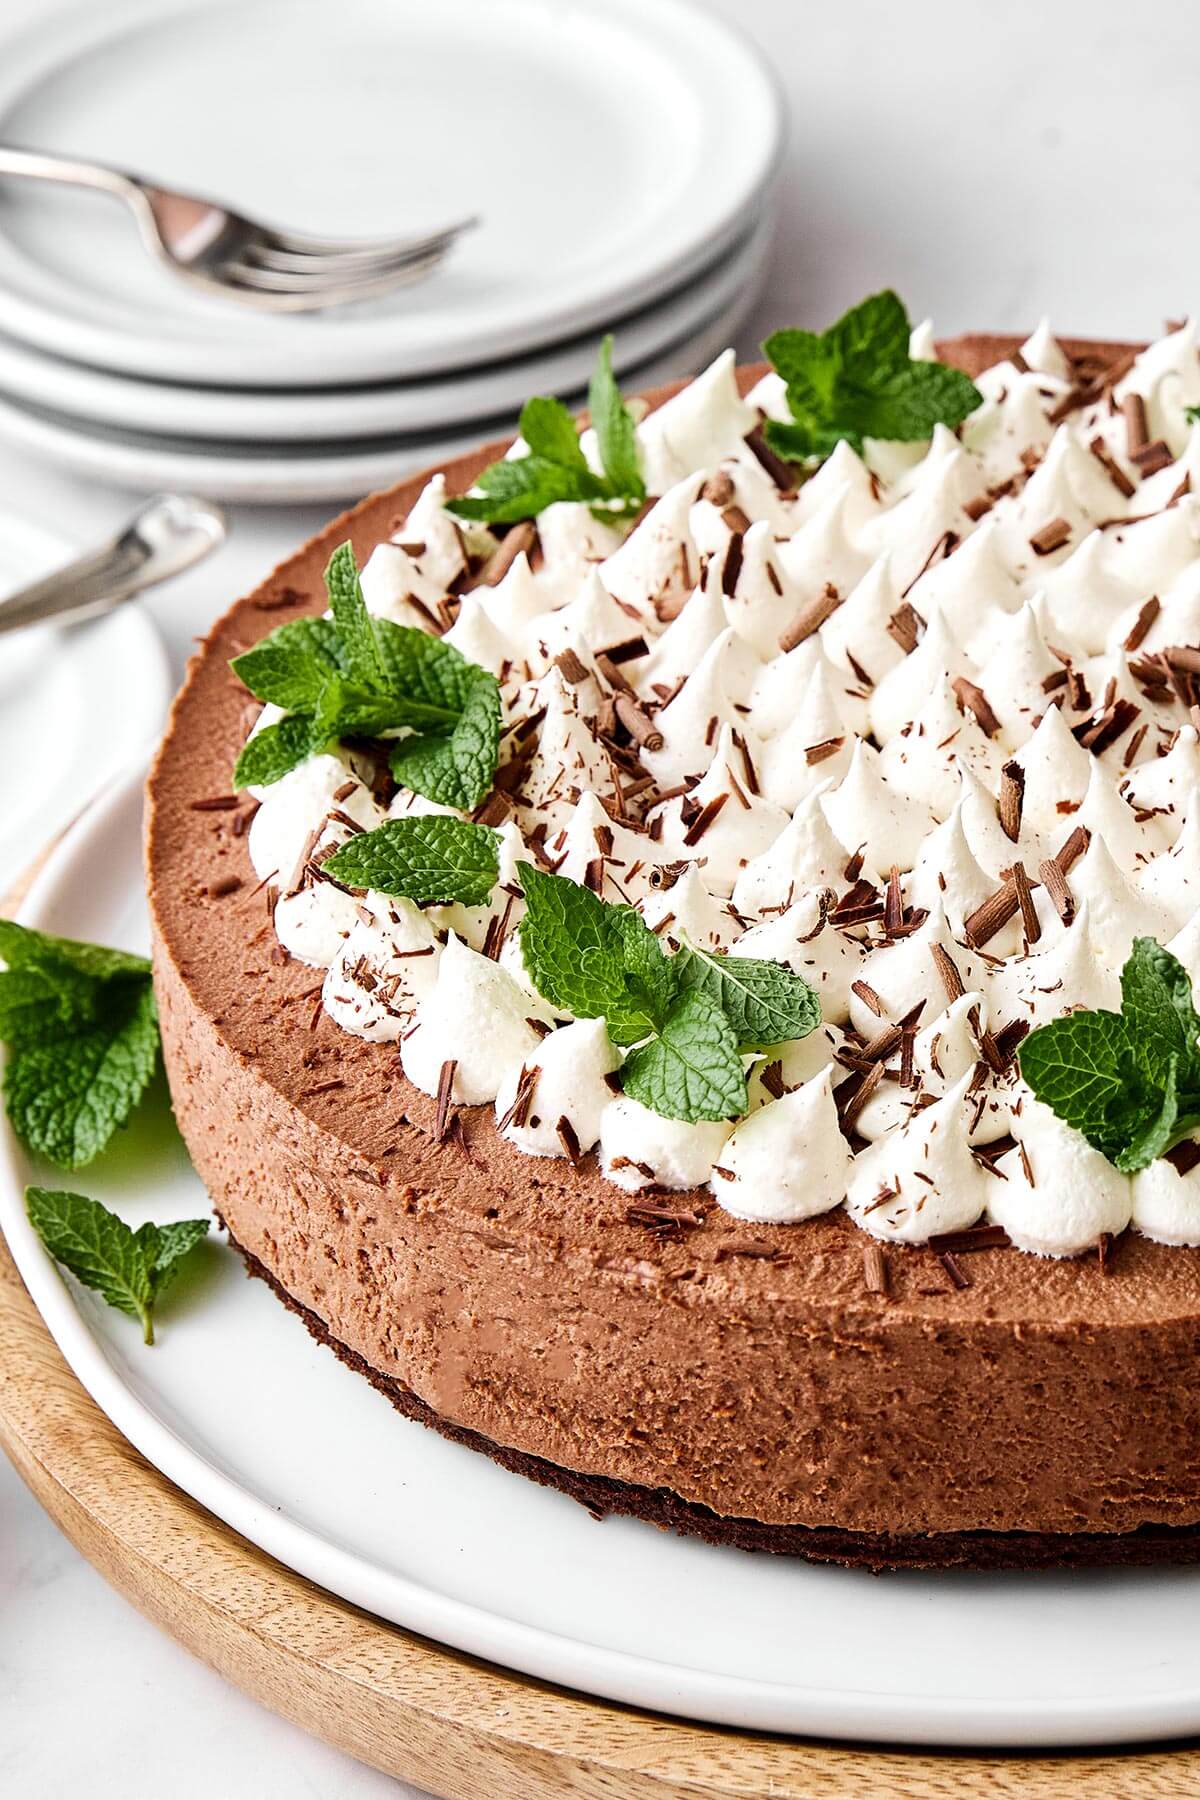
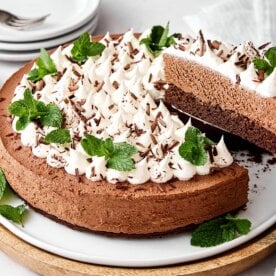
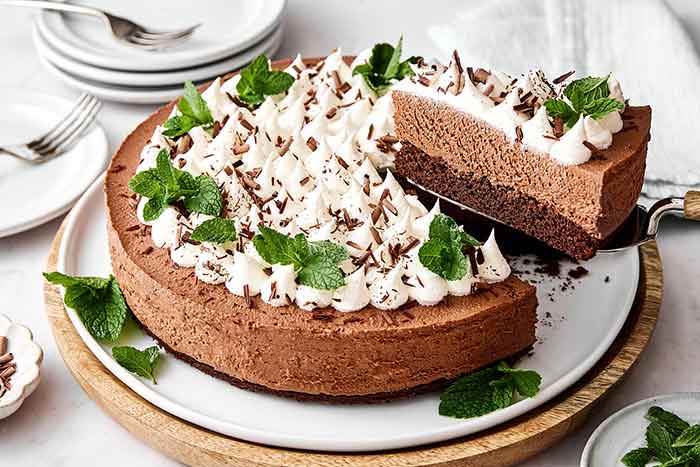
This mint chocolate mousse cake will definitely impress guests with its layers of rich, minty chocolate goodness and a fluffy whipped cream topping.
Why You’ll Love This Chocolate Mousse Cake
I have to admit, this mint chocolate mousse cake might be the best birthday dessert I’ve made yet. If you’re new here, I have a tradition of making a mint chocolate dessert for my birthday every year (you can scroll down for more on that). But this year, I’d been itching to make a chocolate mousse dessert, and that somehow morphed into this over-the-top cake that tastes really incredible (if I do say so myself). It starts with a layer of my classic paleo chocolate cake, followed by a creamy mint chocolate mousse, and finished off with dollops of whipped cream and shaved chocolate. It’s a celebration cake for sure! Here’s what else I love about it:
- Every layer is simple to make. Once your ingredients are prepped and mixed, it’s just a matter of baking or chilling, then layering everything together.
- It’s completely gluten-free. Even my friends who aren’t gluten-free were shocked by how good it was. Years of gluten-free baking really paid off here!
- It’s stunning and delicious. The garnishes make it celebration-worthy, but the flavor and texture speaks for itself. You will go back for more!
Mint Chocolate Mousse Cake Ingredients
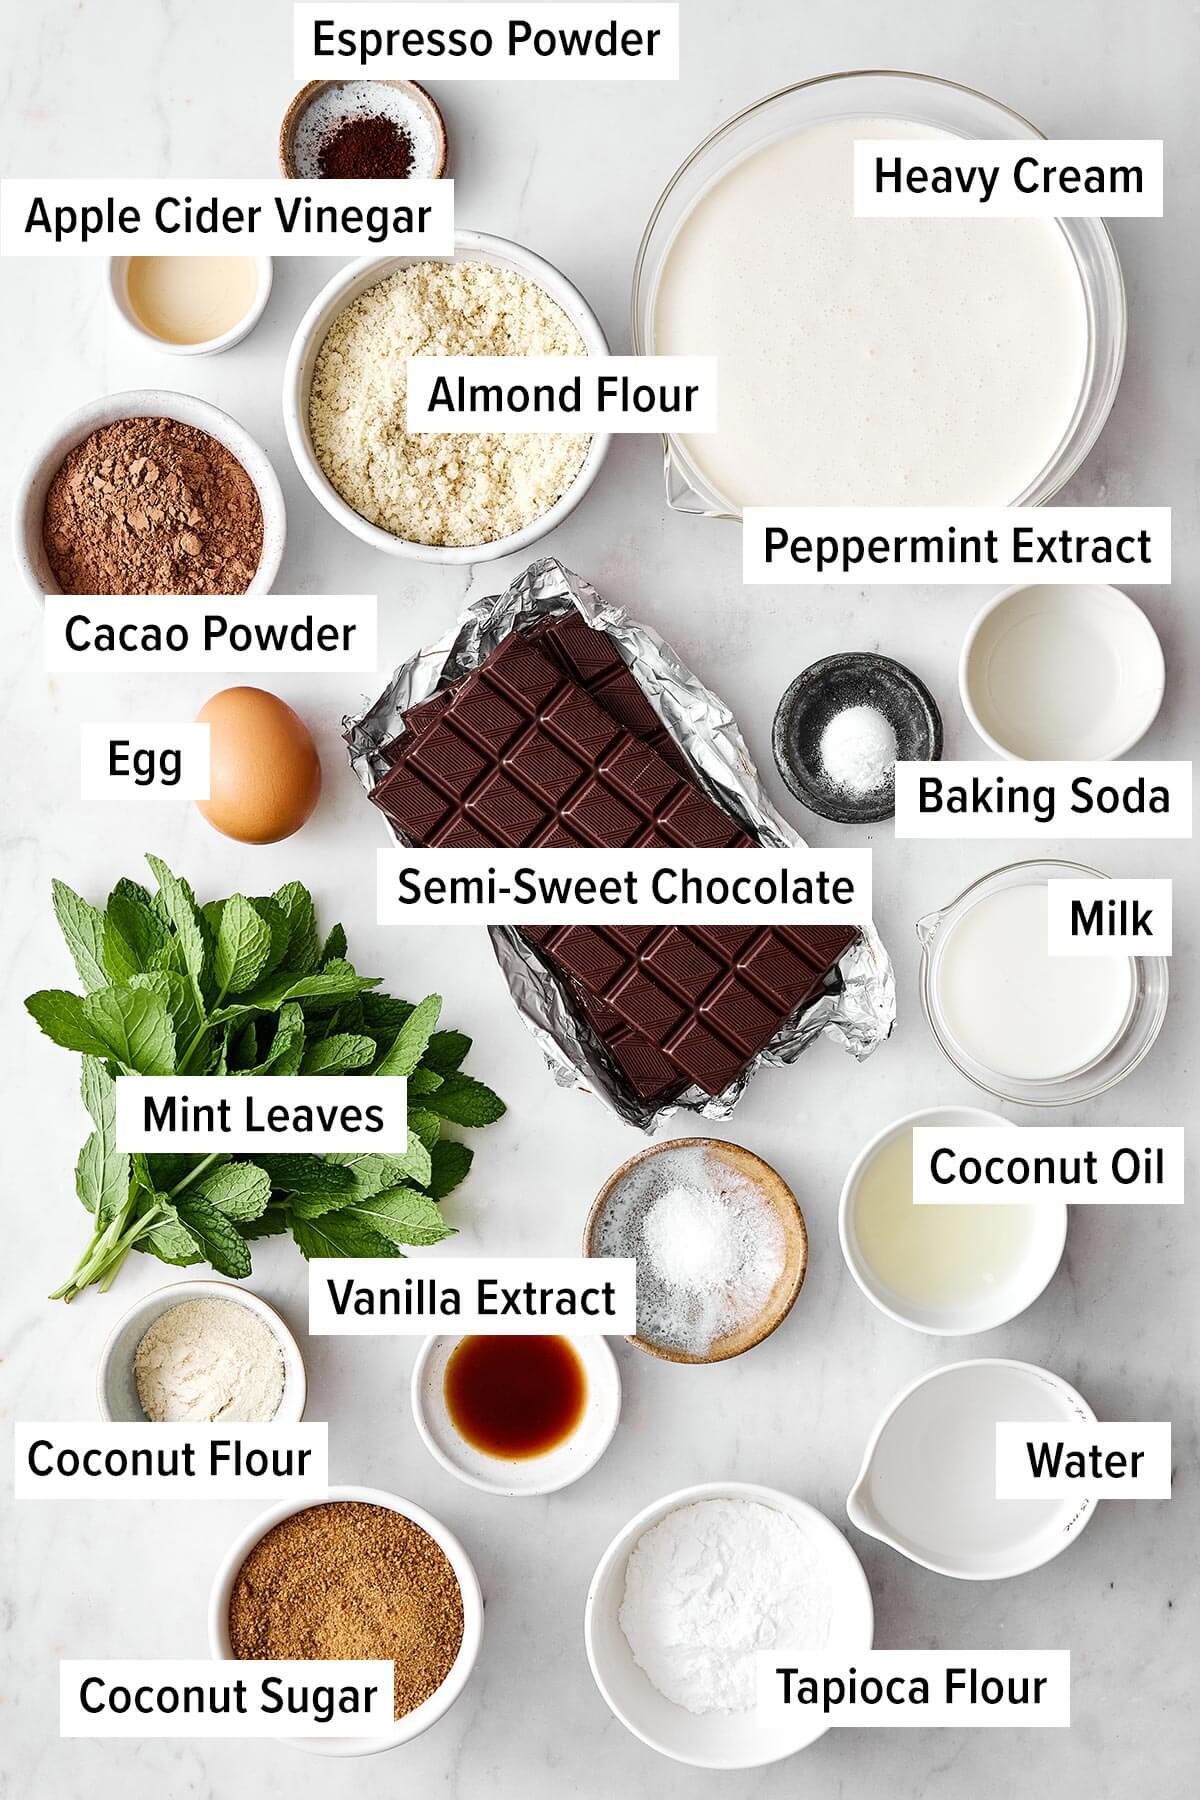
- Chocolate cake dry ingredients: I’m using my trio of almond flour, tapioca flour, and coconut flour, along with cacao powder, coconut sugar, baking soda, and espresso powder.
- Chocolate cake wet ingredients: Classic baking ingredients, including eggs, milk, coconut oil, apple cider vinegar, and vanilla extract.
- For the chocolate mousse: This is a creamy mix of heavy cream, semi-sweet chocolate, vanilla extract, peppermint extract, coconut sugar, and a pinch of salt.
- For the whipped cream: All you need is chilled heavy cream and vanilla extract! I don’t add extra sweetener, though you can if you’d like.
- Garnishes: I like to add chocolate shavings and fresh mint leaves for the final touch, but it’s completely optional.
Find the printable recipe with measurements below.
How To Make This Mousse Cake
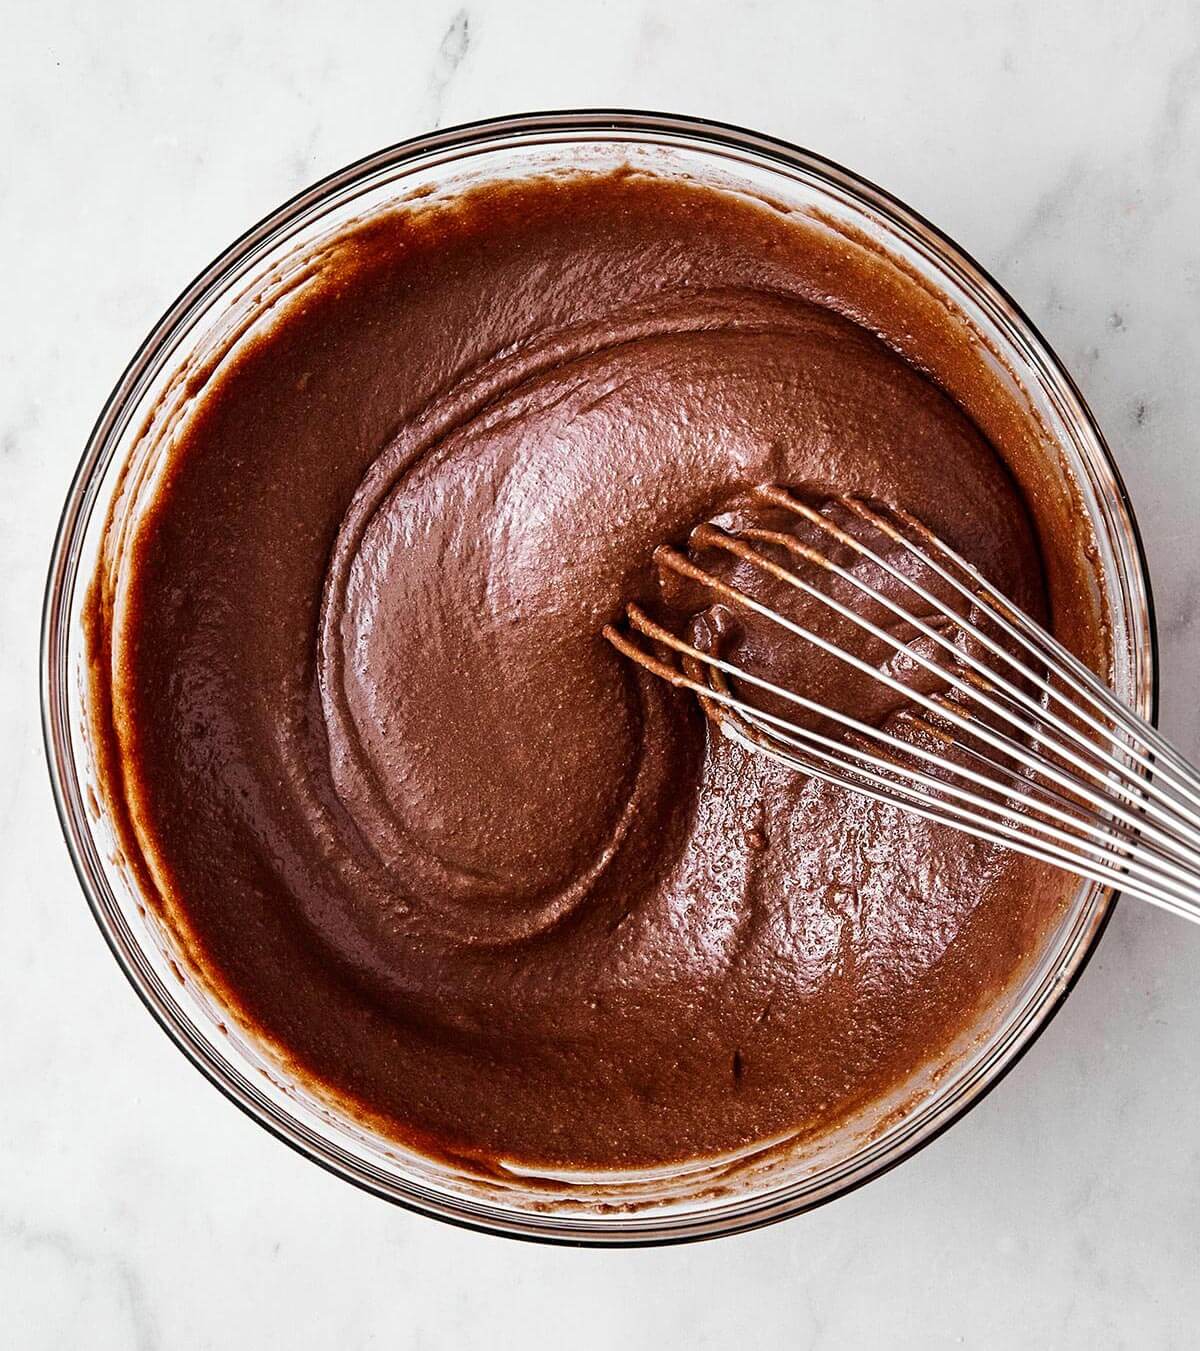
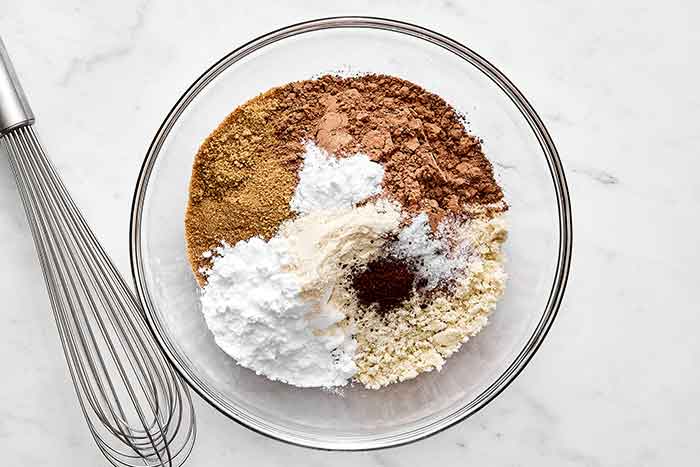
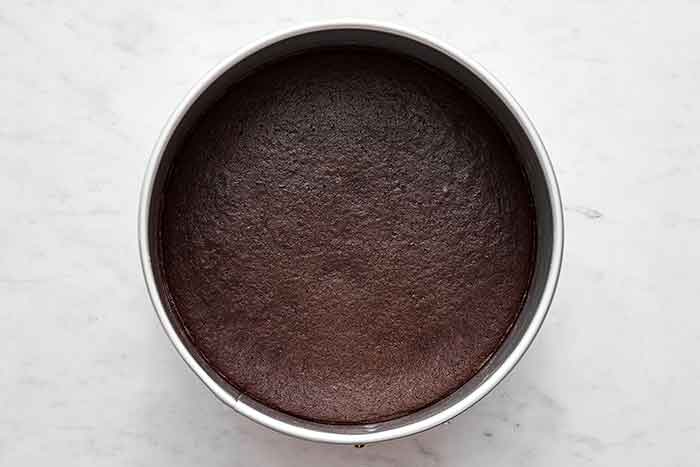
First, let’s make the chocolate cake! Start by greasing and lining a 9-inch springform pan. In one bowl, whisk together all your dry ingredients: almond flour, coconut flour, tapioca flour, coconut sugar, cacao powder, baking soda, espresso powder, and salt. In another bowl, mix the wet ingredients: egg, milk, water, coconut oil, vinegar, and vanilla extract.
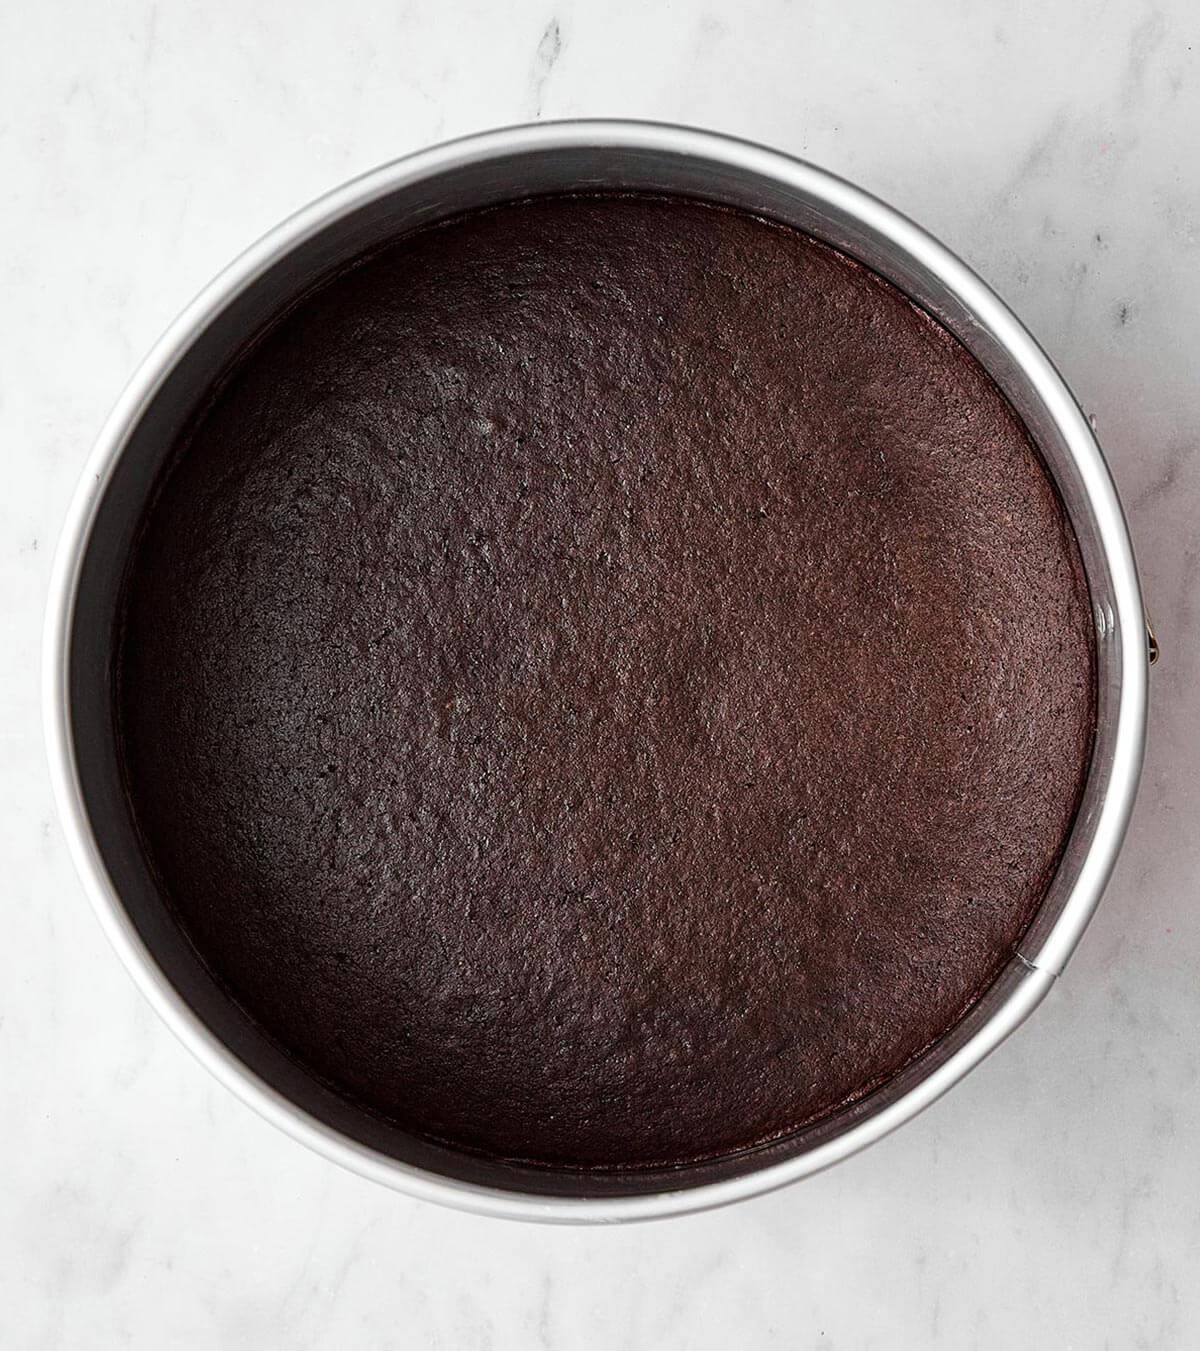
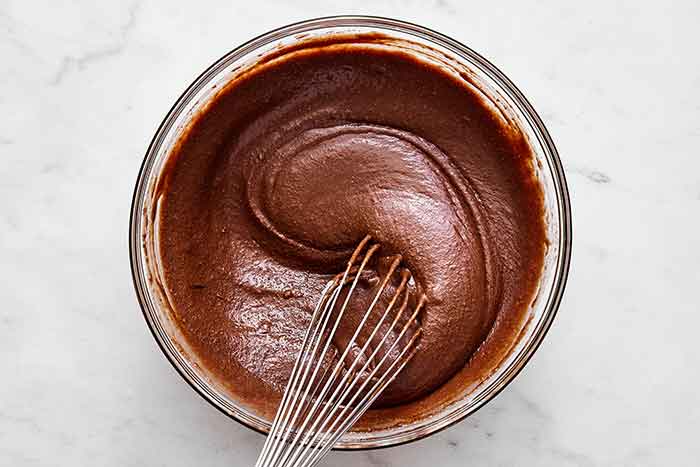
Pour the wet into the dry, whisk until smooth, then spread the batter into your pan. Bake at 350°F (175°C) for 12 to 14 minutes, until a toothpick comes out clean. Let the cake cool completely before moving on.
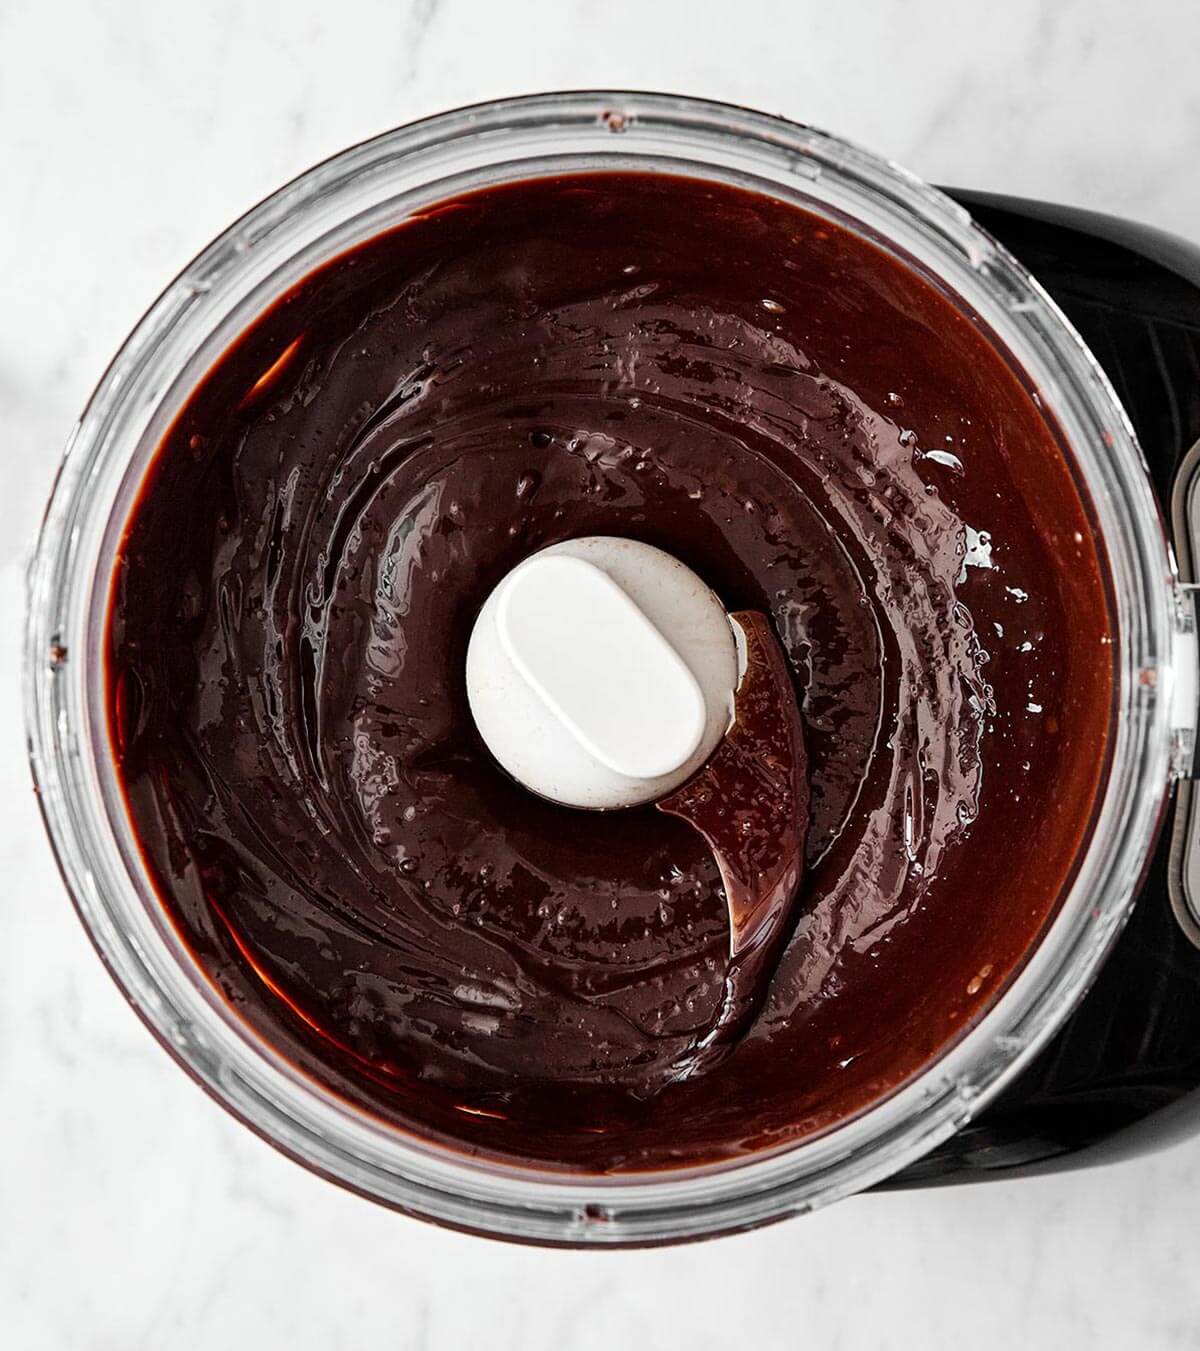
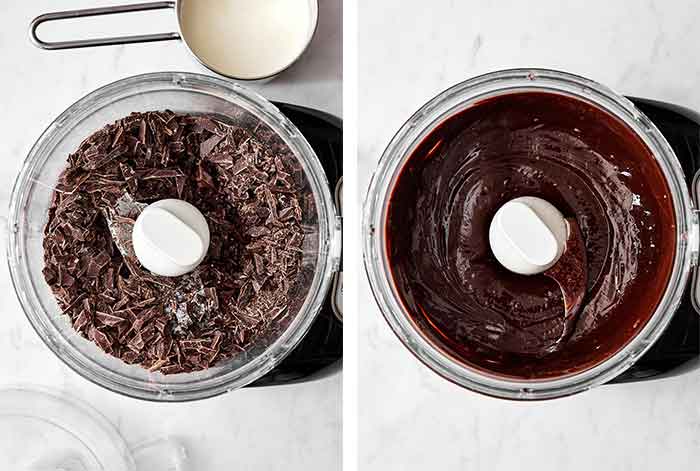
Next, make the chocolate mousse. Add the chopped chocolate, vanilla extract, peppermint extract, and a pinch of salt to a food processor. Heat one cup of heavy cream just to a boil, then slowly pour it into the processor while blending the chocolate mix, until the chocolate turns silky smooth. Transfer to a bowl and let it cool.
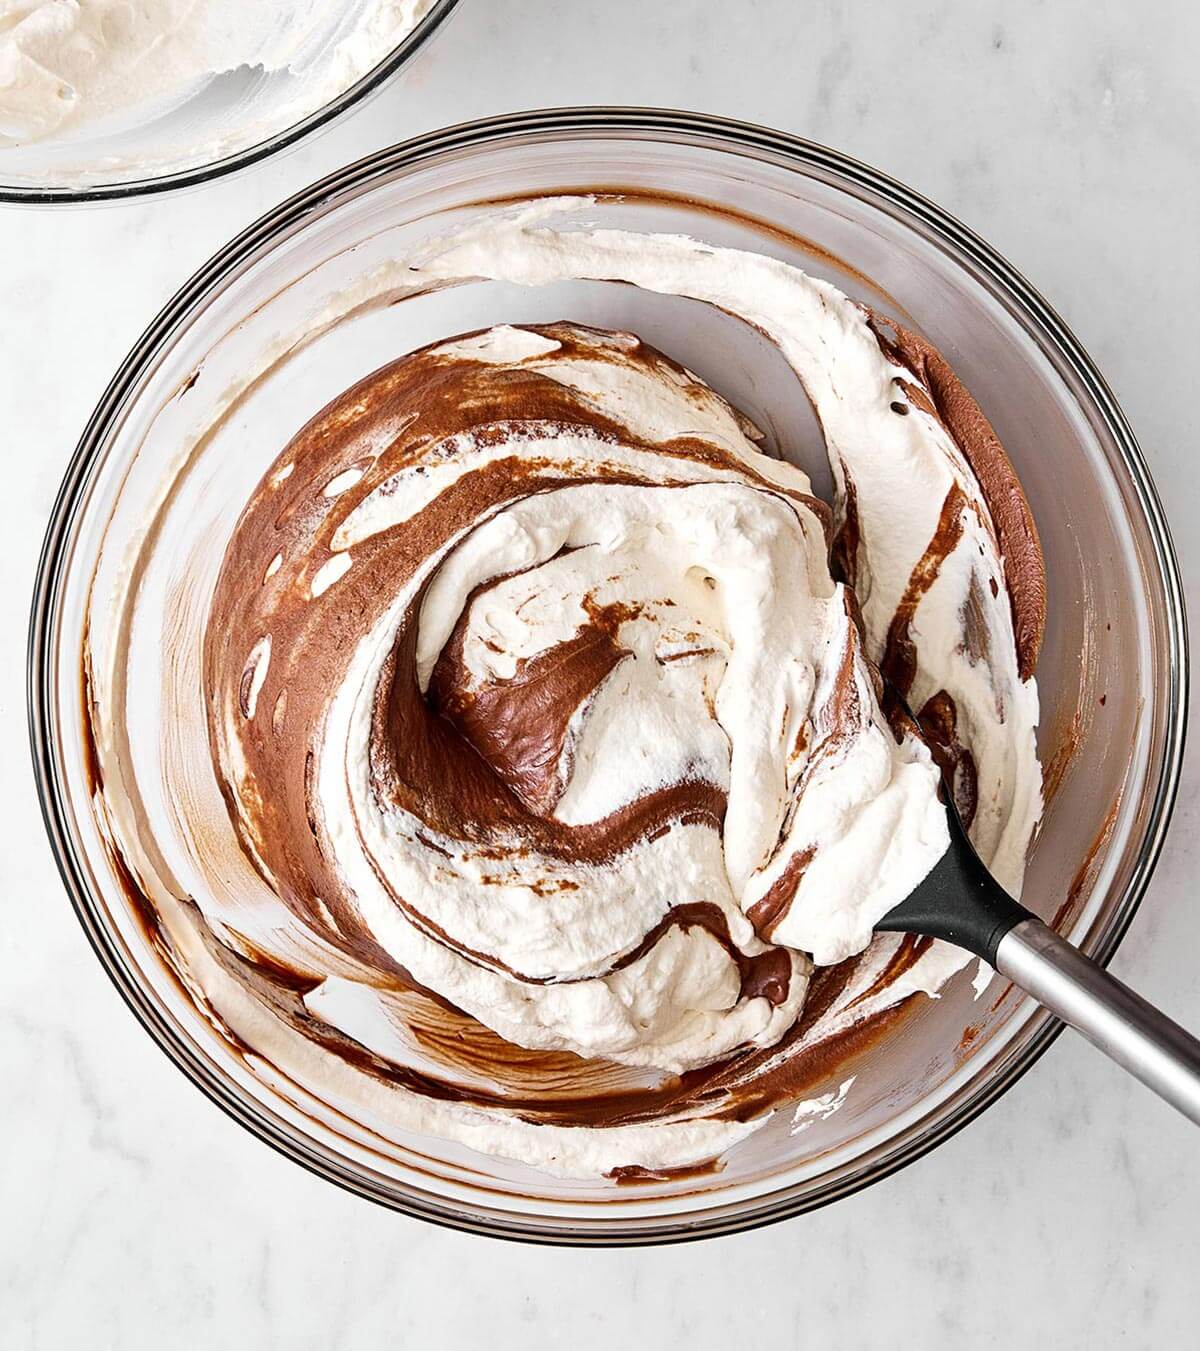
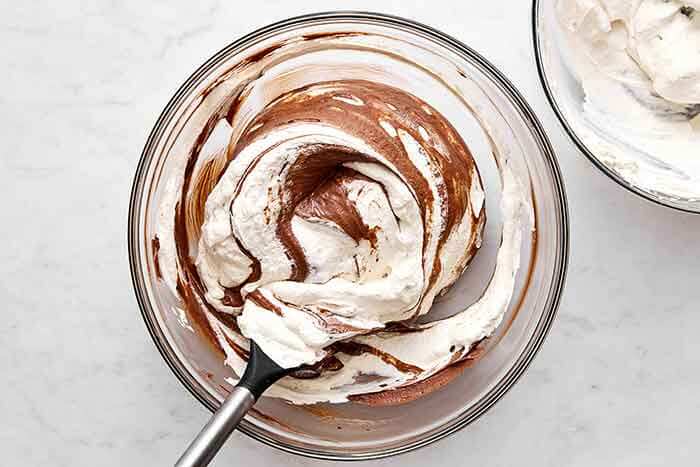
Whip 2 cups of heavy cream with a bit of coconut sugar until stiff peaks form, then gently fold it into the chocolate mixture.
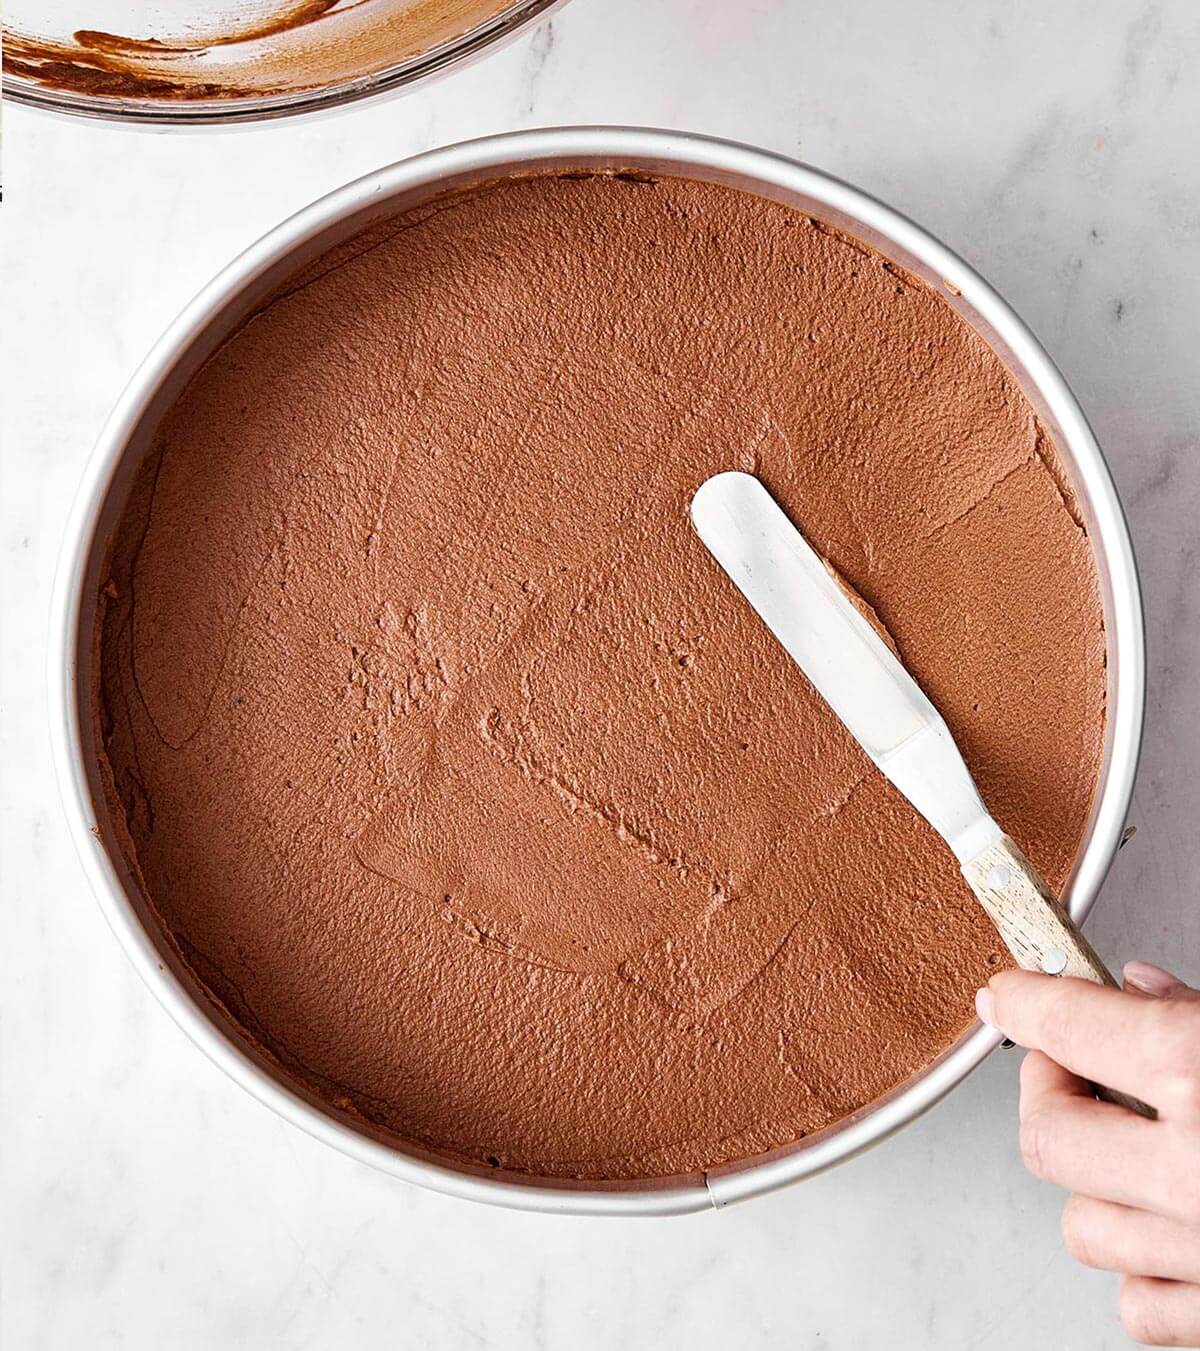
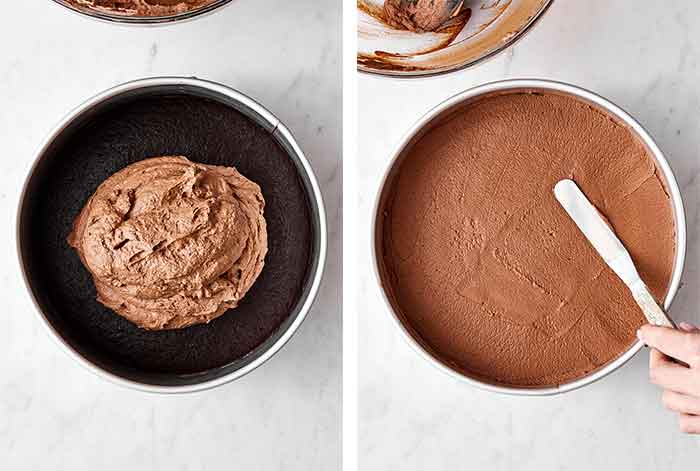
Now, it’s time to assemble the cake! Spread the chocolate mousse evenly over the cooled cake base, smoothing the top with a spatula. Pop it into the fridge to chill until set, about 6 hours (or even overnight if you’d like to make it ahead).
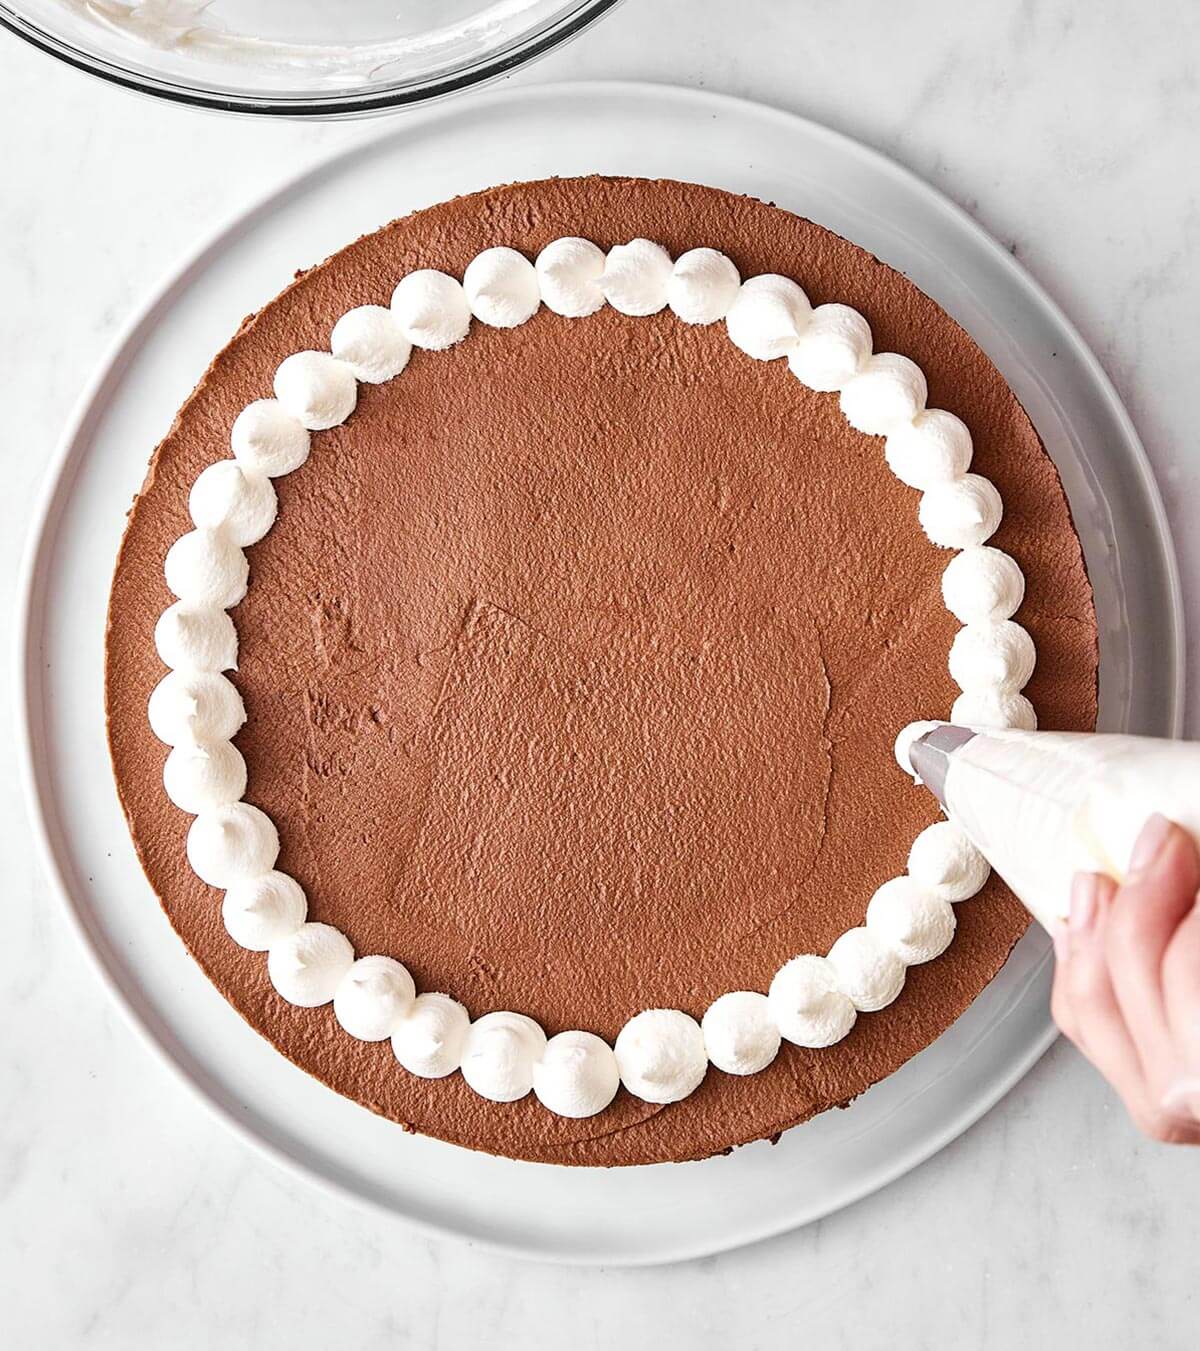
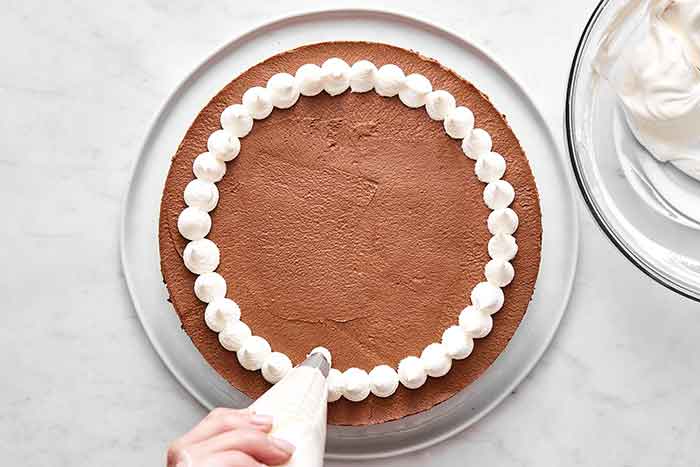
Lastly, add the whipped cream topping. Whip up more heavy cream with a splash of vanilla until soft, fluffy peaks form. Pipe little mounds on top of the cake, then finish it all off with chocolate shavings and fresh mint leaves for that extra touch. Slice, serve, and enjoy!
Storage Tips
This cake is perfect for making ahead of time. Just make the cake and mousse layers, then store it in the fridge (covered so it doesn’t dry out) for up to 2 days. You can then add the whipped cream topping and garnishes before serving.
If you have leftovers, you can also freeze individual slices. I recommend cutting the cake into portions before freezing, then storing the slices in a freezer-safe container. That way, you can just pull one out when a chocolate craving strikes. Let the slices thaw in the fridge overnight or on the counter for about 30 minutes before serving.
More Mint Chocolate Desserts
I’ve got plenty more mint chocolate desserts below from my previous birthday recipes. But, I’d love more suggestions on what I should make for my birthday next year! Let me know in the comment box below.
- Mint Chocolate Chip Nice Cream (2024 birthday)
- Mint Chocolate Chip Mug Cake (2023 birthday)
- Gluten-Free Thin Mint Cookies (2022 birthday)
- Mint Chocolate Energy Balls (2021 birthday)
- Mint Chocolate Vegan Cheesecake (2020 birthday)
- Peppermint Truffles (2019 birthday)
- Mint Double Chocolate Chip Cookies (2018 birthday)
- Chocolate Peppermint Slice (2017 birthday)
- Mini Skillet Brownies with Mint Chocolate Chip Ice Cream (2016 birthday)
If you make this mint chocolate mousse cake recipe, I’d love to hear how it turned out in the comment box below! Your review will help other readers in the community. And if you’re hungry for more healthy food inspiration and exclusive content, join my free newsletter here.
Mint Chocolate Mousse Cake
Description
Video
Equipment
- Springform Pan The one I've had for over a decade.
- KitchenAid Hand Mixer My favorite hand mixer!
- Glass Mixing Bowls Perfect for mixing in each step.
Ingredients
For the cake
- ¾ cup almond flour
- ¼ cup tapioca flour
- 1 tablespoon coconut flour
- ½ cup coconut sugar
- ⅓ cup cacao powder
- ½ teaspoon baking soda
- ¼ teaspoon espresso powder
- ¼ teaspoon kosher salt
- 1 large egg
- ⅓ cup milk (dairy or dairy-free)
- ⅓ cup water
- 2 tablespoons coconut oil
- 1 teaspoon apple cider vinegar
- ½ teaspoon vanilla extract
For the mousse
- 3 cups heavy cream, divided
- 12 ounces semisweet chocolate, finely chopped
- 1 teaspoon vanilla extract
- 1 teaspoon peppermint extract
- pinch kosher salt
- ¼ cup coconut sugar
For the whipped cream topping
- 1 cup heavy cream, chilled
- ½ teaspoon vanilla extract
For garnish
- chocolate shavings
- fresh mint leaves
Instructions
To make the cake
- Combine the dry ingredients. Preheat the oven to 350°F (175°C). Grease and line the bottom of a 9-inch springform with parchment paper. To a mixing bowl, add the almond flour, tapioca flour, coconut flour, coconut sugar, cacao powder, baking soda, espresso powder and salt. Whisk together.
- Mix with wet ingredients. To a separate mixing bowl, add the egg, milk, water, coconut oil, vinegar, vanilla extract. Whisk together, then pour the wet ingredients into the dry and whisk for 1 to 2 minutes, to create the cake batter.
- Bake the cake. Pour the batter into the springform pan and cook for 12 to 14 minutes, until a toothpick comes out clean. Let cool to room temperature.
To make the mousse
- Melt the chocolate. To a food processor, add the chocolate, vanilla extract, peppermint extract, and salt. Bring 1 cup of heavy cream just to a boil in a small saucepan. With the processor running, gradually pour the hot cream through the feed tube and process until the chocolate is melted and smooth. Transfer chocolate mixture to a large bowl. Let it cool to room temperature, stirring occasionally.
- Fold in whipped cream. Add 2 cups of chilled heavy cream and the coconut sugar to a large bowl. Use a hand mixer to beat until stiff peaks form. Fold into chocolate mixture.
- Pour mousse into pan. Pour the mousse on top of the fully cooled cake, and flatten with a spatula. Chill until set, about 6 hours. Note: this can be prepared 1 day in advance.
To make the topping
- Whip the cream. Add the chilled heavy cream and vanilla extract to a medium bowl. Use a hand mixer to beat until medium-firm peaks form. Transfer to a pastry bag fitted with a round tip, and pipe mounds of cream on top of the pie.
- Serve and garnish. Garnish with chocolate shavings and fresh mint leaves before serving.
Lisa’s Tips
- Storage tip: This cake is perfect for making ahead, especially if you’re planning it for a celebration. You can store it in the fridge for up to 2 days, just be sure to keep it covered so it doesn’t dry out. Then add the whipped cream and garnishes before serving.
- Freezer tip: If you have leftovers, you can also freeze individual slices. I recommend cutting the cake into portions before freezing, then storing the slices in a freezer-safe container. That way, you can just pull one out when a chocolate craving strikes. Let the slices thaw in the fridge overnight or on the counter for about 30 minutes before serving.
- I recommend removing the mousse cake from the springform pan immediately after you remove it from the fridge, while it’s still chilled. If you let it thaw first, you’ll likely have some of the sides stick to the pan, when it opens.
- You can of course just add the whipped cream to the top in a smooth layer, if you don’t have a piping bag. You can also add additional sweetener to the whipped cream topping while beating, if you’d like.
- If you plan on letting this sit for a while before serving, adding ¼ teaspoon cream of tartar to the whipped cream while beating helps to stabilize it.
- If you serve this straight from the fridge, the mousse layer will be quite firm. I recommend removing it from the springform pan, then letting it come to room temperature for 20 to 30 minutes, before topping with the whipped cream.
Nutrition
©Downshiftology. Content and photographs are copyright protected. Sharing of this recipe is both encouraged and appreciated. Copying and/or pasting full recipes to any social media is strictly prohibited.

Behind The Scenes
I still can’t believe I’m turning 49 this year! But I’m gonna soak up and enjoy this last year of my 40’s. Starting with this decadent chocolate mousse cake… which I may have eaten 5 or 6 slices by now (all in the name of recipe testing 😉).
If you’ve made my paleo chocolate cake before you’ll be a pro at this recipe. And the mousse layer and whipped cream layer are both quite easy. Though I do recommend planning to make this cake at least one day in advance, as it needs a good 6 hours or so to chill. It’s not a difficult recipe, just a little time consuming (with baking, cooling, and chilling), but it’s absolutely worth the effort!


I love this cake❤️ just wondering if I just want to make half the recipe what size springform pan would I need to use?
Do you reckon I can skip the mint extract, and keep all other ingredients as is? One of my guests at a near-future dinner does not like mint (shocking to me, but okay) and I wanted to make this cake. Thank you!
Hi Virlana – yes, if you’d like a simple chocolate mousse cake feel free to leave out the mint extract. A simple tweak!
We made this for my birthday because I was curious about it. I don’t really like cake, but I love chocolate and mint. We were all delighted! It was so very delicious! It literally tasted like a thin mint cookie. Love at first bite. We made the cake the night before and then the mousse the next morning, it was really easy. Another great recipe!
Hi Tiffany – Happy birthday! And yes, it does taste like a thin mint cookie. So happy you loved it as much as I do!
Wow and Wow! I decided to make this cake for my birthday as Lisa has done. If you like rich, if you like chocolate, if you like whipped cream, this cake is for you. I made the cake ahead of time and froze it and then the week of my birthday, I defrosted it, made the mousse, covered the cake with it and refrigerated it overnight. And then the day of my birthday, I topped it off with the whipped cream topping. I found it easy done in stages and it was a total hit with my family. Thank you Lisa for this amazing cake. In the past I never wanted to eat the cakes that my family bought for my birthday but this year I insisted on making my own cake that I could actually enjoy eating and I’m so glad I did.
Hi Linda – Happy birthday! I’m so glad you and your family loved this mint chocolate mousse cake.
AMAZING! This cake was loved by all 💕. I will definitely put this in my baking rotation! Thank you Lisa for sharing another awesome birthday dessert
I’m so glad everyone loved this cake, Megan!
What a fabulous recipe, thanks Lisa! I was nervous about the first slice getting it out but had followed your instructions and tips and that first slice was easy peasy and yummy 😋
Wonderful! Glad the cake turned out perfectly, Sharon.
I made this cake for my daughter’s fifth birthday, this was her choice and I give a huge thumbs up. Everyone loved it especially the birthday girl. Thank you for the recipe and the timing that it came.
Amazing! Happy to hear this cake was a hit for your daughter’s birthday, Kelle.
The hint to add cream of tartar to the whipping cream was inspired. We had everything to make this cake for a gathering of friends and it was enjoyed by everyone. There are several folks who need to be gluten free, including me, so I often turn to your recipes for inspiration. I believe that we should make foods for gatherings that everyone can enjoy in unity. it is such a bummer to show up at the Labor Day picnic and find not a thing I can eat. So unnecessary with resources like yours!! Never a miss when I use your recipes and your tips for substitutions for other allergy or sensitivities actually work to make delicious treats that include more people. Thanks!!
Hi PJ – Thanks for leaving a review and happy to hear this cake was the perfect dessert to make for your weekend festivities!
Is there a Dairy free alternative for the heavy cream?
Looks amazing!
Hi Michele – I haven’t tested a dairy-free version of this recipe yet. But I’ll keep that in mind for the future!
Happy Birthday, Lisa! My best wishes, always. I’m amazed by your creativity and kindness. Beyond delicious mousse cake. Very flavorful, delicate to the palate, and easy to make. This is a fantastic recipe. Since I am not a fan of mint with chocolate, I replaced it with orange extract and loved it.
Thanks so much, Grazia! Also, the orange extract sounds amazing paired with the chocolate. Thanks for sharing your variation!
Is there a diary free version?
Is there a vegan substitute that could be used for the cream?
Hi Melissa – I haven’t tested this recipe with any dairy-free or vegan alternatives yet. But I’ll keep that in mind for the future!
Hi Lisa, could I make this with regular flour? I do not have to be gluten free.
Thank you. Leslie
Hi Leslie – unfortunately, you can’t swap regular flour for gluten-free flours without tweaking other ratios usually.
Made this for my brother and husband. It was my brother’s birthday and my husband loves chocolate mint ice cream. Perfect cake to make! They raved!
Amazing! I’m so glad everyone loved this chocolate cake, Kathleen.
Can coconut sugar be replaced with any other type?
Hi Suzy – yes, you can use any granulated sugar.
Happy Birthday Lisa! Its my birthday too, 1st September!
Happy belated birthday, Heather!
This sounds delicious! I LOVE that this is gluten free. In the last couple of years several people in my social circle have developed dietary intolerances and allergies, so it’s great to have another recipe in the arsenal.
Going to enjoy making this. Also, Happy Birthday, Lisa!
Thanks so much, Nabeela! I hope you and everyone in your social circle enjoys this chocolate cake!
If I can’t have heavy cream, could I replace it with coconut cream? Thank you! Looks yummy!
Hi Jan – I’m not sure coconut cream would whip and fold into the chocolate mixture the same way. But if I try a dairy-free version in the future I’ll update the notes!
Happy birthday, Lisa! It’s my husband’s birthday too, and he loves chocolatey-minty desserts, so you brought us his birthday “cake” recipe just in time. I so appreciate your helpful tips – i.e. to remove it from the pan straight out of the freezer for ease, and adding cream of tartar to the whipped cream for stability. This dessert is a lovely, creamy-but-not-heavy, refreshing treat for summer. Thank you!
Aw, happy birthday to your husband as well. Glad this was the perfect cake to celebrate with!
Lisa,
HAPPY BIRTHDAY!!! Your recipes are outstanding and I have to tell you that I have fallen in love with cooking/baking because of you! I made this mint chocolate mousse cake yesterday and it’s so delicious… You once again knocked another recipe “out of the park”!
Cheers to 49!
Thanks for the birthday wishes, Annie! Happy to hear you loved this cake as much as I do!
Happy birthday!! Best wishes 🌼
We making this tomorrow.
Thanks so much, Laurian!
Next birthday keeping a mint theme. Try doing a flourless mint chocolate lava cake.
Thanks for sharing that idea, Glenn!!
I can’t wait to try this! It looks delicious!! Happy Birthday!
Thanks, Danielle! Can’t wait for you to try this as well!
Happy Birthday
Cake looks delicious
Unfortunately my daughter is allergic to chocolate so would not be able to make it
Thank you for all your wonderful recipes
Oh, bummer! But, thank you for the birthday wishes, Barbara.
Have you ever tried to sub out the coconut flour? I have an allergy but would love to try this recipe. Thanks for sharing!
Hi Jen – I haven’t tried that yet.
Can’t wait to try this!!!
Enjoy, Deb!!
I really enjoy all your recipes. Mostly reading them and many times making them. I realize this is a very special occasion cake, but I don’t have many of the ingredients called for and I don’t know when I would ever use them all again, so it’s just too expensive.
Hi Gretchen – No problem at all! I also plan to make a plain chocolate mousse recipe at some point, which will be a much more simplified recipe. Hope you can make that one in the future!
Making this now for my Labor Day celebration tomorrow. Cake and mouse done. Will get the final verdict tomorrow but a quick taste individual it’s delicious !!!!
Can’t wait to hear how this turns out, Rebecca!
Happy Birthday Lisa..🎉🎉🎉🥳🍰🥂🎁🎉🎉🎉! Enjoy your Day!!!
Look forward to trying your cake …. Mint Chocolate is my Favorite …. Although my Mom used to make me a Pecan Raisin Cake.❤️
Thanks so much, Patricia! Can’t wait for you to try this cake.
I really enjoyed making and eating this pie. However, I have family that do not like mint so I made 2. /the second one I left the mint extract out and it also was a hit. Either way it is a win win
Glad this cake was a hit for everyone, Mark!
Made the Mint Chocolate Mousse Cake recently and it was a big hit! I must confess though, not a fan of coconut. So I substituted cake flour for the coconut flour and cane sugar for the coconut sugar with little change in flavor. I’ll definitely be making this again!
Wonderful! Glad everything else about this cake worked out perfectly, Sandi.
This is right up my alley and it looks amazing, but i’m wondering when I make this do I have to use the espresso powder and is there a replacement for it? I don’t want my little ones consuming coffee or even myself if I have a piece before bed.
Hi Linda – you can omit the espresso powder if you’d like. That’s just to enhance the chocolate flavor. Hope you enjoy it!
Lisa, this looks amazing but I don’t like coconut! How can I make it without the coconut flour and oil?
Hi Sheila – unfortunately, I haven’t tested this recipe without the coconut ingredients. But if I do in the future, I’ll make sure to update the notes!
Happy Birthday!
This sounds amazing. Is there a way to make this dairy free? I know I could substitute non dairy milk for the regular milk, but what about the heavy cream?
Would love to hear your thoughts as this looks so good!
Hi Elizabeth – thank you for the birthday wishes! I haven’t tried making this dairy-free yet, but if I do in the future I’ll add a note here. :)
This is a sensational Birthday Cake Choice. It is decorative and inviting and so delicious. Wow, you have to try this one. Its amazing.
Great to hear your cake turned out perfectly, Annette!
Downshiftology’s Mint Chocolate Mousse Cake is a showstopper in every sense. With a rich, gluten-free chocolate cake base, a silky mint chocolate mousse layer, and a cloud of whipped cream on top, it’s indulgent without being overwhelming. The peppermint adds just the right amount of freshness to balance the deep cocoa notes, and the texture is pure velvet. It’s elegant enough for celebrations, yet simple enough to make ahead and enjoy anytime.
You nailed all the good parts of this cake, lol! Enjoy, Yanina.
Happy birthday 🎉 I can’t wait to try this recipe! I bake for my parents weekly and I’m sure this will be a hit. I have enjoyed so many of your recipes over the years. Thank you 🩷
Thanks, Terri! I hope you all enjoy this cake.
Lisa, you culinary genius,
Your Mint Chocolate Mousse Cake almost caused a domestic crisis at my house. Why? Because I used my fresh mint from the garden (which I’ve been protecting from snails, squirrels, and suspicious neighbors), and now my family thinks I’ve gone full gourmet chef. Spoiler alert: I haven’t. It’s all YOU.
This cake is so velvety, so smooth, so dangerously delicious, I caught myself whispering sweet nothings to it while it chilled. And let’s be honest, if I had a Vitamix, I could probably blend my way to even more mint-chocolate perfection… maybe even make a mousse so fluffy it needs its own seatbelt.
In short: Best. Dessert. Ever. Fresh mint approved. Vitamix-worthy. I’ll be here waiting for my blender, and another excuse to make this cake. 😉
Hi Becky – Thanks so much for leaving a review! I’m so glad this cake turned out perfectly and that you enjoyed it as much as I do.
Looks great! And you look 29, not 49.
Aw, thanks so much Eleni!
I was looking for a white frosting and asked a young friend at church. Her reply, “Go to downshiftology; I trust her recipes!” (And, this young lady is an excellent cook!) I thought that thought was so valuable to share with you! 🥰
Aw, thanks for sharing that with me, Cordelia!
Happy birthday to you 🎂 💛 trying this today
Thanks so much, enjoy!